Tuesday, July 17, 2012

Veneer - glue up and vacuum pressing process

I prepared the veneer skin by seaming the veneer with veneer tape. The side you see with the tape is the show side and the other side is the glue side. This particular glue up is destined to be the balancing veneer on the floor of my entertainment center. In other words, it will be on the bottom of the cabinet facing the floor, so all pressure is off to get this perfect!
L1030370-2012-07-15-19-46.JPG

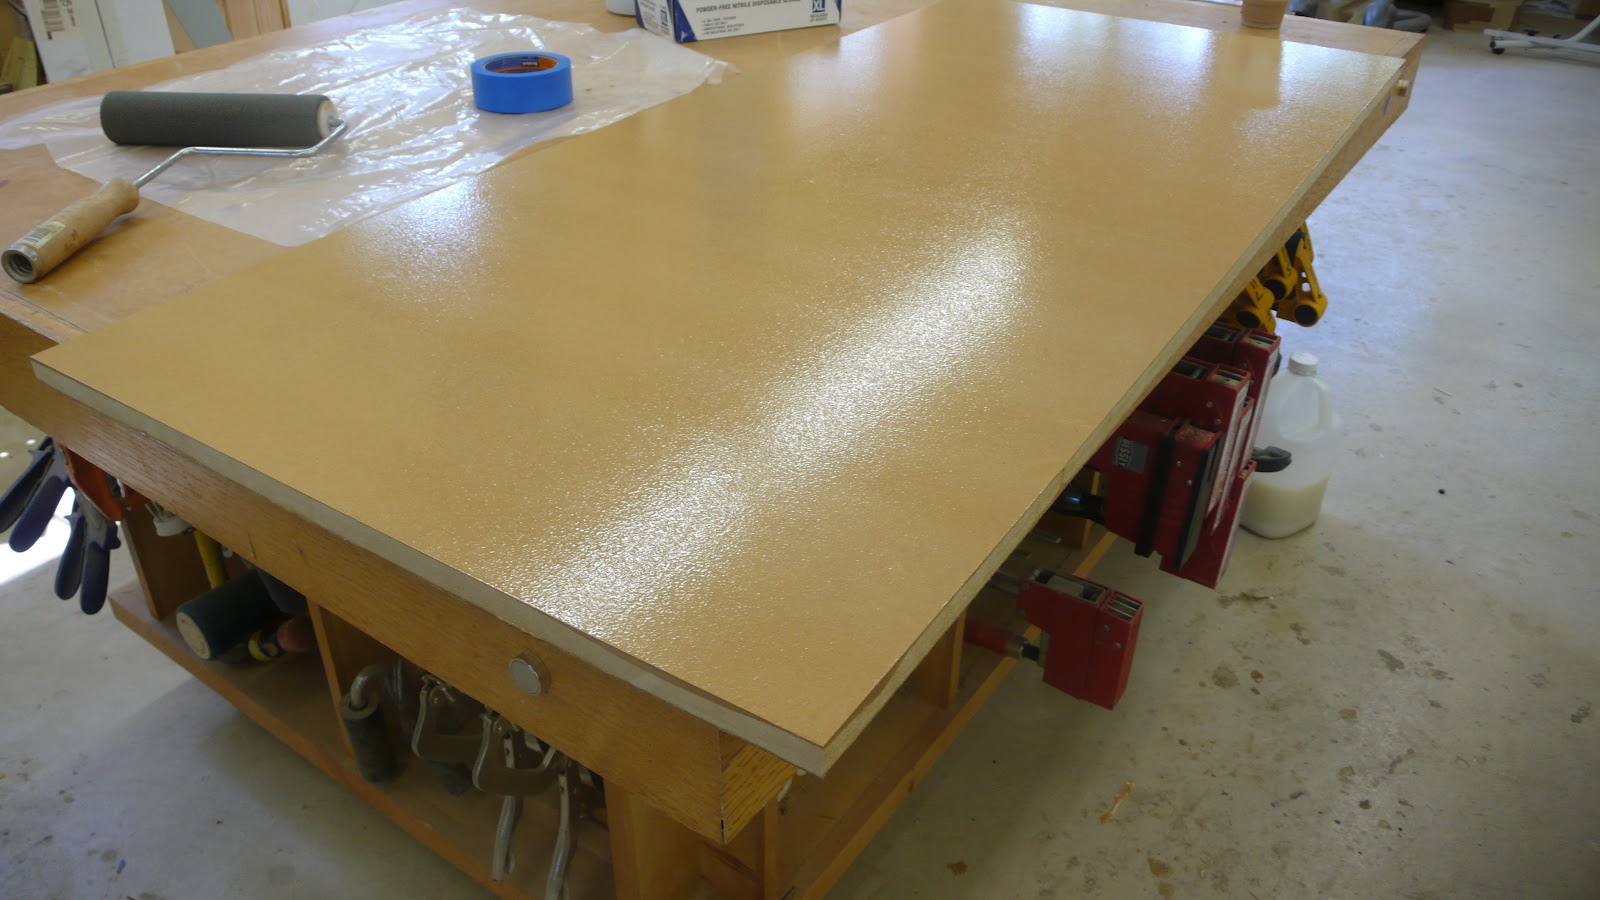
Cauls are prepared for both sides of the veneer. I use 3/4 inch MDF that I’ve pre covered with plastic to ensure that I don’t glue the panel to the caul.
L1030371-2012-07-15-19-46.JPG

I’ll spread the glue with a paint roller. I’ve found these black rollers work very well.
L1030372-2012-07-15-19-46.JPG

Gloves and blue tape need to be on hand.L1030373-2012-07-15-19-46.JPG

The glue is a two part glue consisting of a resin and a hardener mixed in a ratio of 4:1.L1030376-2012-07-15-19-46.JPG

I mix is slowly adding a little of the powdered hardener at a time, then stirring until it has been incorporated into the resin.
L1030377-2012-07-15-19-46.JPG

Here is the glue mixed and ready to spread. It has the consistency of thick syrup.L1030378-2012-07-15-19-46.JPG

I pour some on the MDF panel that is the substrate for the veneer skin I’m applying.
L1030379-2012-07-15-19-46.JPG

The paint roller is used to spread a thin coat of the glue evenly on the substrate.
L1030380-2012-07-15-19-46.JPG

L1030381-2012-07-15-19-46.JPG

I carefully lay the veneer skin on the substrate with the glue face facing the glue. This may seem inherently obvious, but it is very easy to make a fatal mistake at this point (which I know from experience!)

I use clear packing tape in a few places around the substrate to fix the veneer skin to the substrate so it will not move as the vacuum press starts to apply pressure.
L1030382-2012-07-15-19-46.JPG

L1030383-2012-07-15-19-46.JPG

I place the top caul over the panel and very carefully align it so the substrate is completely covered. I size the cauls so I end up with about a 1/4 inch overhang.
L1030384-2012-07-17-08-46.JPG

I use blue tape to bind the sandwich together. The idea is to tape the entire assembly so it will not move as the vacuum press begins to apply pressure.
L1030387-2012-07-17-08-46.JPG

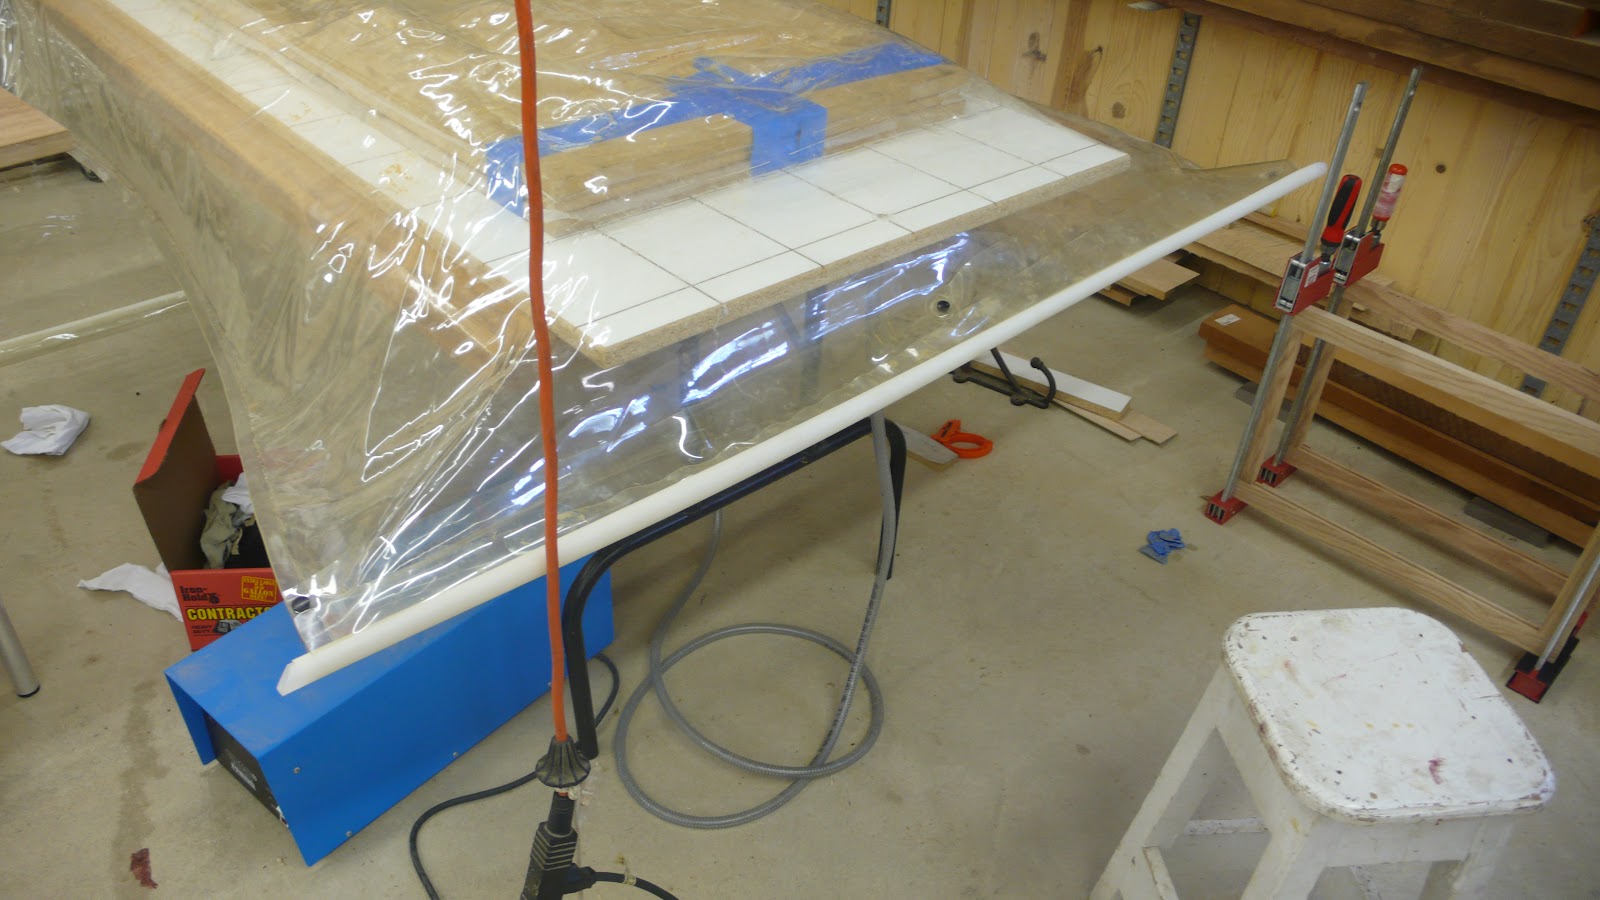
The assembly is very heavy, so I’ve devised a very simple system so I can do this by myself. I’ve built the veneer sandwich on a movable cart that is slightly higher than my vacuum press. I can position the assembly in front of the press and carefully load it into the bag.
L1030388-2012-07-17-08-46.JPG

I seal the bag and turn on the vacuum.L1030389-2012-07-17-08-46.JPG

Once the vacuum has removed all the air inside the bag, the pressing is underway with about 1400 pounds per square foot of pressure on the sandwich.
L1030392-2012-07-17-08-46.JPG

L1030393-2012-07-17-08-46.JPG

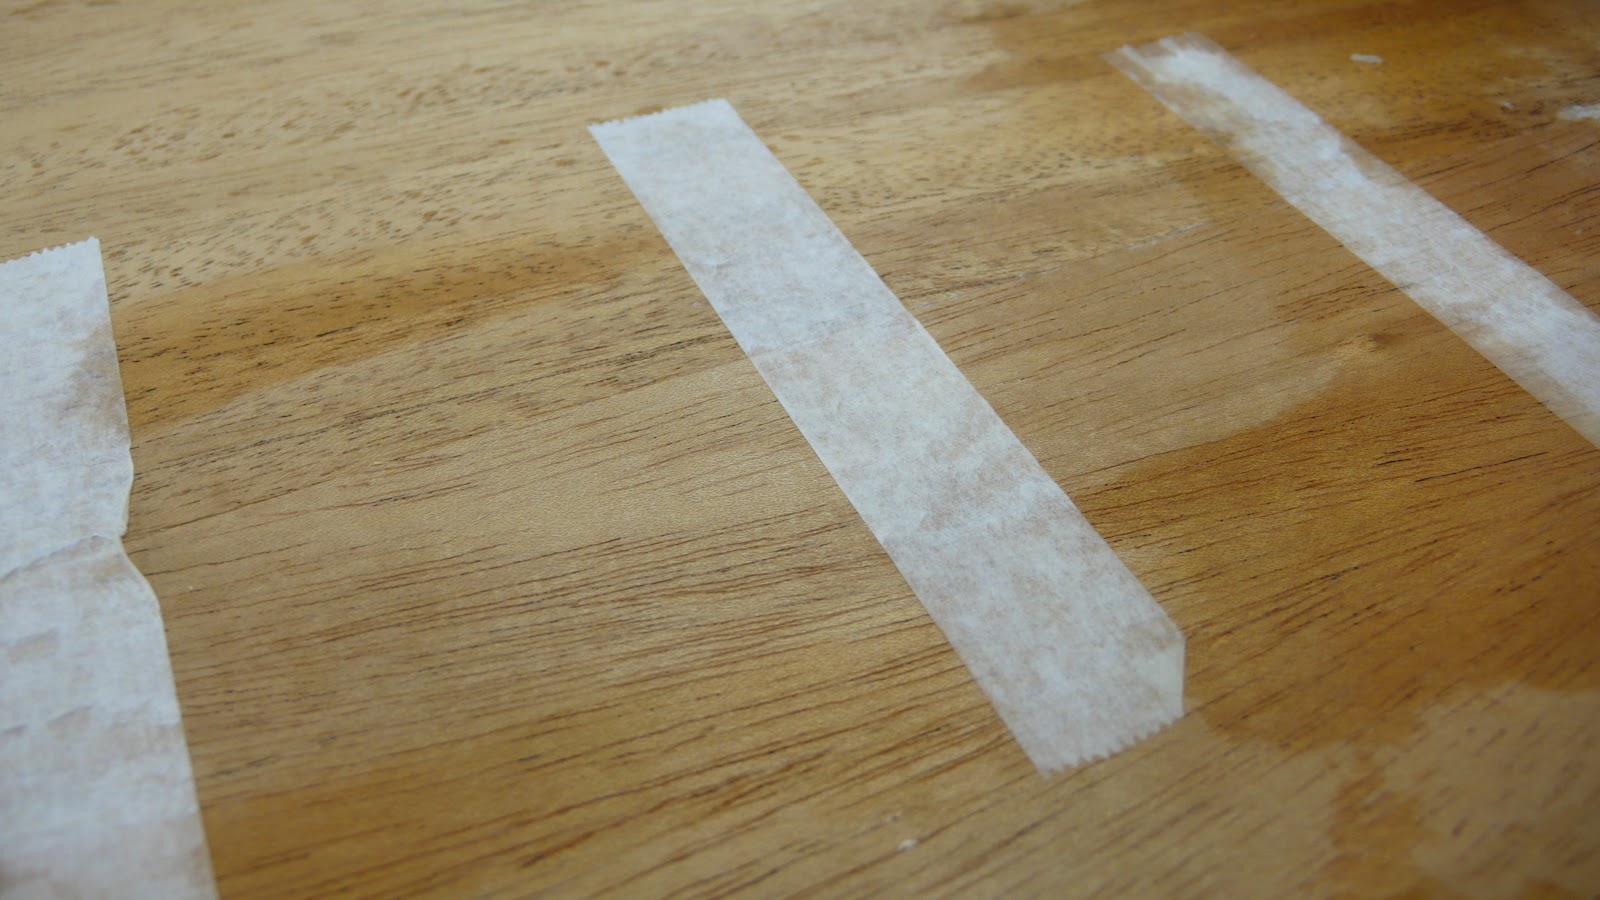
After the glue has cured (how long this takes depends upon the temperature, but it takes a minimum of four hours) I remove the panel from the press. Now I must remove the veneer tape. I do this using a sponge to soak the veneer tape with water to reactivate the glue. Then it is a simple matter of carefully easing the tape off the panel.
L1030394-2012-07-17-08-46.JPG

L1030395-2012-07-17-08-46.JPG

L1030396-2012-07-17-08-46.JPG

Monday, July 9, 2012

Veneer - specialized tools and simple joinery techniques

Working with veneer does require a few specialized tools.
L1030323-2012-07-9-20-17.JPG

Cutting veneer can be done using a variety of tools depending upon the type of veneer and the specific type of cut being made. A good straightedge and a veneer saw is one of the more common methods.

L1030332-2012-07-9-20-17.JPG

The fabric cutter (white with orange) is an example of a tool designed for another purpose (cutting fabric) that can be extremely useful for certain types of veneer cuts. In addition to the veneer saw and fabric saw, I occasionally us a very, very sharp chisel that I’ve slightly modified to cut veneer, and I also have a surgeon’s scalpel that is “scary” sharp. I tend to use the scalpel more when I’m doing marquetry or when I’m trying to cut difficult veneer with squirely grain.

The soft bristle brass brush is used to massage the moist veneer tape to get the best possible surface contact with the veneer tape. The little roller is a wallpaper roller I stole from my wife years ago. I use it to massage the seams to get the seam perfectly flat.

L1030333-2012-07-9-20-17.JPG

Veneer tape is probably the most unusual item. It is a thin paper tape with a moisture activated glue on one side. This tape dispenser makes moistening and cutting the tape easy.

The following sequence of photos shows the process of seaming two pieces of veneer together. I first cut both pieces for the joint using a straightedge and veneer saw. Next I use blue painters tape to carefully align the two edges together. I use one inch veneer tape across the joint followed by two inch veneer tape along the joint. The bottom photo shows the result after pressing. The photo will not really show it, but the resulting joint is virtually invisible!

L1030325-2012-07-9-20-17.JPG
Two pieces of veneer edge jointed and ready to be joined.

L1030326-2012-07-9-20-17.JPG
Blue tape is used to bring the edges into precise contact.

L1030327-2012-07-9-20-17.JPG
Veneer tape is placed across the joint.

L1030328-2012-07-9-20-17.JPG
Blue tape removed.

L1030329-2012-07-9-20-17.JPG
Veneer tape placed along joint on top of joint.

L1030330-2012-07-9-20-17.JPG
Result after pressing. The idea is to make the joint disappear.

Friday, July 6, 2012

Veneer - Substrate and glue

I’ve heard a lot of misinformation about gluing veneer, particularly regarding the type of glue you should be using. The absolute worst glue you can use on a veneer project is contact cement. I’m amazed at how often I see some magazine advise using contact cement for veneer, or worse yet, occasionally on a woodworking television show. Contact cement is formulated to be used with rigid material like formica. Contact cement does not form a rigid glue line and always maintains a certain amount of flex or give to it. White and yellow glues are better, but still do not result in a rigid glue line. Additionally, the working time for white or yellow glues is relatively short and you have to work quickly before the glue sets up. The best glue for working with veneer is one of a family of glues based on urea formaldehyde because it has a relatively long open time and cures based on a catalytic reaction.

L1030337-2012-07-6-11-38.JPG

I’ve used a product called Unibond800 for years and have great success with it. Unibond800 has the unique characteristic of an absolutely rigid glue line after curing. This makes this glue ideal not only for veneer but also for bentwood lamination work. When using it for bentwood lamination, I experience virtually no spring back after removing the work piece from the glue form.

It does have a couple of drawbacks. First, it has a relatively short shelf life of about 6 months to a year, depending upon the temperature you’re storing it at. And second, since you add a catalyst powder to the glue, you must use whatever you mix because whatever is left will cure rock hard. Third, and this is a relatively minor one, the glue cures best in a warmer environment. If you are doing a glue up and the temperature is below 70 degrees, you need to cover the project with a heating blanket, or else the glue might not set at all.

The substrate you choose needs to be perfectly flat, free from any voids or surface defects, and as free from seasonal wood movement as possible. Plywood is an excellent choice, but you need to select high quality plywood that is free from internal voids. MDF is a wonderful substrate for veneer because it is dead flat, free from any internal voids, and will not change dimensions seasonally.

L1030317-2012-07-6-11-38.JPG

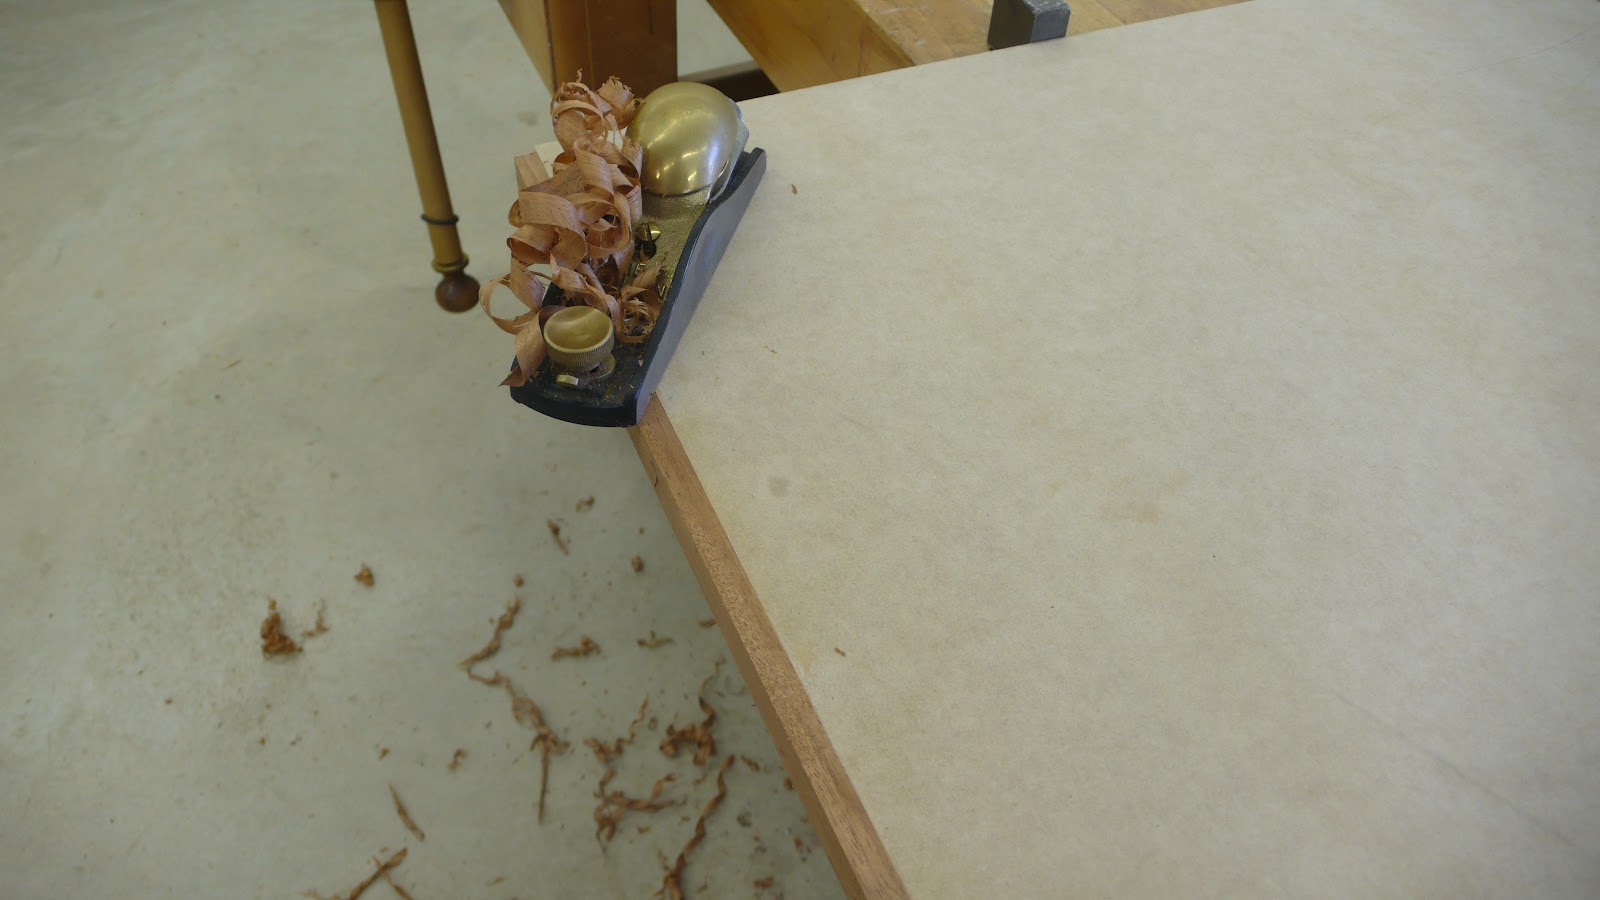
The picture above is a piece of MDF that I’ve applied 3/8 thick mahogany edge banding to. Later I’ll use a hand plane to bring the edge banding exactly to the surface of the MDF, and eventually glue the veneer on top of the edge banding, giving the illusion of solid wood.

L1030318-2012-07-6-11-38.JPG


Thursday, July 5, 2012

Veneer - A mystery to most modern amateur woodworkers


L1030309-2012-07-5-12-56.JPG

Most amateur woodworkers and many professional woodworkers have never used wood veneer in a project. But most of us have used plywood products in our projects. And we all know that plywood is made from veneer, usually oak, cherry, maple, and to a lesser extent, more exotic woods like walnut. Plywood is also available in some tropical hardwoods, but finding it is exceedingly difficult. For my Mahogany entertainment center, for example, I need plywood made with very fine South American Mahogany veneer. I seriously doubt such plywood even exists in a commercial product, but if it did, I would expect it to be extremely expensive. So I really only have two options: I could make the entire project out of solid Mahogany. The problem doing this is very simple, Mahogany hardwood is very scarce and in my area, is priced starting at over $11.00 per board foot. And I would have to find enough solid mahogany that is consistent in color, figure, and free from defects, and in the thickness I need for each of the constituent parts. This would be a very expensive option and difficult option.

My other option is to make my own plywood out of high quality Mahogany veneer, which means I only need to find a relatively small amount of solid Mahogany for the legs, door styles and rails, etc. The very first class I ever took at the Marc Adams School of Woodworking was a class taught by Darryl Kiel, president of Vacuum Pressing Systems, on the basics of working with veneer. This class completely changed my woodworking life and taught me a wonderful and very different approach to woodworking. Even extremely scarce and exotic hardwood that would be impossible to find as solid wood is usually available as veneer. In fact, by turning precious and scarce hardwood into veneer, veneer manufacturers are effectively preserving a scarce resource. By learning to work with veneer, a woodworker is able to take advantage of this fact in his own projects.

Finding veneer locally, however, might be a challenge in itself. Small quantities of some veneers are available through woodworker stores like Woodcraft, but you will not find large quantities or scarce veneer. For that, I use Certainly Wood out of New York. They have a huge selection of veneers from all over the world, and have an extremely knowledgeable sales staff. There are numerous other sources on the Internet for veneer, but I have been very please with both the quality of the veneer I received from Certainly Wood and with their sales staff.

L1030310-2012-07-5-12-56.JPG

If you do any serious work with veneer, a must have tool is a vacuum press.

L1030311-2012-07-5-12-56.JPG

The vacuum press works on the principle that if you remove all the air from inside the bag, the weight of the atmosphere will press evenly on whatever is inside the bag. Depending upon your elevation above sea level, a vacuum press is capable of putting between 1500 and 1700 pounds per square foot of pressure on the object you are gluing. Here is a picture of some panels being pressed between two MDF platens:

L1030335-2012-07-5-12-56.JPG

I purchased this vacuum press a few years ago from Vacuum Pressing Systems and have been very pleased with its performance. When I’m not using the system, the poly bag rolls up and is stored in a box and the vacuum pump lives in one of my drawers. The entire system can be put away out of site and takes up very little room in the shop.


Wednesday, June 20, 2012

The design process - How I designed the entertainment center

For me, the part of the craft of woodworking I enjoy the most, the part that draws me into deep thought and hours of pleasant contemplation, is the design process. I’m probably unusual in this regard because it takes me back to my roots as a young engineer over four decades ago, when I first stared at the vast expanse of blank white paper on my drawing board. I had a design in my head, but where to start? Where to put that first mark on the paper? At times, the vast expanse of white drafting paper stayed pristine for hours while I grappled with how to begin. How to start. Over the years, I’ve learned two very valuable lessons:

  1. Paper is very cheap, and so is pencil lead and erasers. There is nothing wrong with “false starts” where your initial direction is simply wrong. It is strangely satisfying when you finally admit to yourself that the direction you took is wrong, and it is OK to just tear up the paper and start over again.
  2. The least expensive place in any project to remove errors, regardless of if you are designing a spacecraft, or very complex software, or a Mahogany entertainment center, is while the project is still on the drawing board!
With those two lessons in mind, I force myself to slow down, and to become immersed in the design process. In my professional life I’m a computer expert who has designed and written complex software over nearly my entire career. For my woodworking life, however, I avoid using any computer aided design software. I find I simply spend too much time trying to make the software do exactly what I want it to do, time and energy that subtracts from my overall attention to the thing I’m actually designing. So I put on some soft classical music, carefully tape a very large piece of velum on the top of my assembly table, get out my old fashioned drafting square, my triangles, my lead holder, my lead sharpener, and my electric eraser, and I immerse my mind in the design process.

DSCF1576-2012-06-20-11-10.JPG

I consider the drawing phase the culmination of the design process, not the beginning of it! The goal of the drawing phase is to clearly and meticulously articulate the design ideas that I’ve already spent a considerable amount of time contemplating. For this entertainment center, I probably started thinking about the form at least two years ago. I’ve already looked at hundreds of examples of entertainment centers that others have designed, some that I liked, and some I did not. There is great value in each, because knowing what it is about something you dislike is often more important than knowing what it is about something you like. At the end of this process, I had selected the picture of the entertainment center by Andrew Drake that I found on the Fine Woodworking web site as the example of the form that I found most pleasing to my eye. This would be where I would begin, and this is the form that I would incrementally change (not necessarily improve) to make it my own design. The first step is to overlay the photograph with tracing paper and draw the image on the tracing paper. Next, based on whatever dimensions I have about the piece, I use a ruler to estimate the dimensions of the piece in the photograph.

DSCF1577-2012-06-20-11-10.JPG


If this sounds like copying, it is not. It is simply not possible for one human being to imagine an original form of anything like this that some other human being, someplace at some time in the past, has not already conceived of. Understanding this basic principle of design, regardless of the discipline, is critical to anyone’s success as a designer. Simply put, originality in design is exceedingly rare, and not necessarily a good thing! For example, if I was obsessed with being completely original, I might be forced to abandon a traditional rectangular shape and use instead a triangle as the basic form for my entertainment center. There is a pretty good chance that I would be the first craftsman to ever design a triangular entertainment center! It would be original, to be sure, but would certainly violate the most basic design principle that “form should follow function!”

Good designers accept that idea and move past it. They realize that true genius comes out of recognizing the great ideas of those who have come before you, then making incremental changes and embellishments to make the piece uniquely yours. The genius part comes into play when your changes result in something that you, yourself find more pleasing. This leads to another critical success factor that is often overlooked: you must really love the thing you’re about to build. Life is too short to waste precious time in the shop building something you really don’t like! Doing so is essentially what some dictionaries defines as work - an unpleasant task! So for me, the drawing process really is the end of the design phase and the beginning of what I hope will be a pleasant and memorable journey into that part of my mind and psyche that most defines me as “me!” It is an intensely personal and completely solitary pursuit, and is one of those activities that sets us humans apart as a species!

Having said all that, let me explain the last couple of steps I took to arrive at the point where I’m ready to create my drawing. Since I’ve started out with a picture of an entertainment center I want to use as a basis for my design, and I’ve estimated the basic dimensions of the piece, now is the time to make changes to the basic form to incorporate my own design ideas. I do this by overlaying tracing paper on top of the first tracing and make my own changes to the form ending up with something like this:

DSCF1578-2012-06-20-11-10.JPG

I’ve added elements to the original design that I think make it more representative of the “Greene and Greene” furniture style. These include the “cloud lifts” on the bottom rail and the door, the ebony plugs, and a very subtle detail near the bottom of each leg. I fool around making various versions of this drawing until I think I have enough to take it to the drawing board.

Up to this point, I’ve totally ignored how I might actually build this piece of furniture. All I’ve cared about is the form. Now that I’m happy with that, I need to create a drawing that both further refines the form and that contains the details I will need to actually build this piece of furniture.

DSCF1580-2012-06-20-11-10.JPG

If possible, I like to do my drawings full scale. In this case, because the piece is too large, I had to choose a scale to shrink it down to a size that would fit on my drawing paper, so I chose half scale. Notice that I’ve made one additional “design” change by adding the stained glass in the doors. I know nothing about making stained glass windows and really have no idea how I’ll pull this part of the project off. At this point, I really don’t care, and never let a minor detail like having no clue how to actually do something stop me from actually doing it!

So now that I’ve completed my design, it’s time to create my materials list and start the rather unpleasant process of actually obtaining the materials I’ll need to build this piece.

Thursday, May 24, 2012

Where to get design ideas

Design ideas are everywhere, but you have to look at them not as a woodworker who wants to figure out how to build each one, but rather as a palette of shapes and forms that you find pleasing to your eye. When looking for design ideas, I make extensive use of the Internet, particularly google and google images. If I query google with something like: “ greene and greene entertainment center” it will return numerous sites that sell furniture over the Internet. Most have images I can click on to get a larger image, and when I find something I like, it is very easy to save that image to my computer. I catalog these images on my Mac using a program called MacJournal. After a few sessions online, I can easily accumulate 20 or 30 design ideas. I also try to capture the dimensions from the web site since that could be helpful later if I attempt to design my own piece loosely based on a particular image.

drake-2012-05-24-15-41.jpg
This is a picture of a Greene and Greene entertainment center I found on Fine Woodworking’s web site made by Andrew Drake. There is a lot to like about this design. First, I think he got the proportions perfect. There is wonderful symmetry both from right to left and from top to bottom. The curved doors are complemented by the curve in the bottom rail. The three drawers in the center occupy slightly less than 1/3 of the interior space, yet give the overall feeling of balance. Most importantly, an important design paradigm is for form to always follow function. You start with function, what the piece is supposed to do, then design the form to achieve the function, yet still be pleasing. I think Andrew Drake has achieved this goal.

Although I’ve found so much to like in Drake’s design, I don’t want to want to reproduce his piece exactly. I do want to use Drake’s design as a kind of design template, however. A “design template” is a kind of bounding box inside which I will place my own design. The basic shape and proportions become something akin to an artist’s canvass. The details inside that bounding box represent the changes I will make to incorporate my own design ideas.

Mahogany Entertainment Center

I’ve decided to join the “blogging” generation so I can record and share my thoughts as work through various woodworking projects. I’ve had my own web site http://www.larryciesla.com for several years and have written extensive articles describing my past projects. But these were always done “after the fact,” months after the project was actually completed. I’ve decided to try to document my entertainment center project differently this time. I want to use my blog posts as a way to force myself to create journal entries as I actually work on the project in the shop. My Mahogany Entertainment Center project is perfect for this because I’m at the beginning of the project and have yet to do the actual design or any woodworking. I anticipate this project will likely take five or six months from the time I make my first mark on my full size drawing until the day I move the finished piece to its new home under my 70” Sharp Aquos TV.


I actually have done some work on this project up to now, but it has been limited to researching the furniture style I want to build in. I’m one of those woodworkers who freely admits that I’m not a “furniture designer” although I do design furniture. My approach to furniture design is to be very pragmatic about what I am and am not good at. I also recognize that certain furniture designers have created their own recognizable style, and for someone like me, choosing a particular (well known) style is a great place to start. I’ve always admired furniture in the Greene and Greene style. I love the use of ebony accents to hide screw holes, or the cloud lift features that often characterize a Greene and Greene piece of furniture. Such furniture is most often made from mahogany and ebony. In particular, most often the mahogany chosen was from South America, which unfortunately, has become very scarce and very expensive. I’ve found a source for purchasing South American mahogany at Owl Hardwood in Lombard, Illinois, and recently purchased a few boards to use to help me work out the finishing schedule. Naturally I’ll try to document how I go about determining exactly how I will be finishing this piece. One of the lessons I’ve learned over my woodworking years is that figuring out exactly how you will be finishing a project should be the first thing you do, not the last!


I expect the construction of this entertainment center to be relatively straightforward, but I do anticipate at least a few interesting problems to have to solve. For me, that is what attracts me to building furniture - solving problems, figuring out how to execute a particular joint, or how to achieve a particular finished look. I’ll try to focus my blog entries on some of the more difficult aspects of building this piece, but will also describe the more common aspects. I hope the content I provide will be interesting to both novice as well as advanced woodworkers.